Potatoes, Gruyere & Caramelized Onion Tart

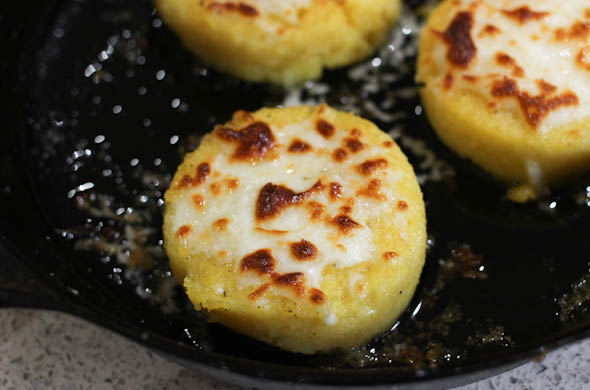
Call it a galette and feel fancy or call it a tart and feel cute. Either way, this sucker was delicious. I used sweet potatoes, white potatoes, gruyere cheese, and caramelized onions tucked inside a not-fussy crust. This #MeatlessMonday plan was hatched when I was inspired after seeing some other posts around like a flaky crust when Eats Well With Others posted a galette with Asparagus & Gruyere  and I wanted all the cheese and potatoes when Bev Cooks posted these Cheesy Skillet Potatoes.
The Three Bite Rule - Potato Tart

We ate this on a drizzly night with a quick arugula salad. It absolutely hit the spot for me. The cheese is the perfect splurge and has perfect nutty meltyness for this. The rest of this is so super cheap so go for the good cheese! Shred it yourself, or slicing/dicing it is fine too!

Potato, Gruyere & Caramelized Onion Tart

Ingredients: (for 1 small tart, feeds ~3 for a meal, or ~6 for a side)

1 sheet pie crust (mine was a roll defrosted from the freezer)
1/2 – 1 small onion
1 sweet potato
1 white potato
~4 oz/1 cup shredded Gruyere cheese (sometimes labeled Alpine style if not imported from Switzerland/France)
2 tablespoons butter
1/4 teaspoon each rosemary, thyme, garlic powder
salt & pepper

Directions:

Bring the pie crust to room temperature.
Slice the onion and add to a skillet over low heat with a drizzle of olive oil/butter. Stir regularly and cook for ~30 minutes until caramelized. (I did this the night before).
Peel the potatoes and cut in thirds. Boil for ~5-8 minutes, until the outsides are getting soft but not cooked all the way through. Then slice into thin disks. A mandolin made this faster (that was my tactic). Or, peel and slice into thin disks and roast in the oven for ~10-20 minutes at 350-degrees.
While the potatoes cook, shred the cheese.
The Three Bite Rule - Potato Tart
Melt the butter and mix in the rosemary, thyme, garlic powder, and salt & pepper.
Spread out the pie crust onto a sheet of parchment paper, baking mat, or baking sheet well sprayed with non-stick spray.
Leaving 1-2 inches around the outside, layer half of the potato slices, half the cheese, and a quarter of the onions. Sprinkle cheese over and drizzle half the butter/herb mixture.
The Three Bite Rule - Potato Tart
Repeat for another layer reserving a few potato slices to be the very top.
Working around the tart, fold crust inward then turn and fold more crust inward and repeat all the way around.
The Three Bite Rule - Potato Tart
Bake 20-30 minutes at 375 degrees. (I baked ~20 minutes when prepping in advance and baked another 10-15 before serving.)
The Three Bite Rule - Potato Tart
Let sit for a few minutes before serving. Enjoy!
The Three Bite Rule - Potato Tart

I prepped this in advance, I know, story of my life. It comes together quickly but getting home on a weeknight with a toddler and two hungry dogs means dinner is really nice when mindless. I baked 20 minutes when I prepped it and another 15 to heat through before serving. I literally partially baked it and kept it on the parchment and covered it in the fridge for the day. Then I uncovered it and slid the parchment back onto a baking sheet that night.

Should we do a cost breakdown? Let’s! I haven’t in forever!

Cost Breakdown (for what was used)

Potato, Gruyere & Caramelized Onion Tart
1 frozen sheet pie crust = $1.59
onion = $0.89
white potato = $0.75
sweet potato = $1.10
Gruyere = $5.99 (used half) $2.99
= $7.32 or ~$2.44 for about 3 servings

Does that sell you on making this for dinner or your next gathering? It is so cheap!

Coconut Shrimp Tacos with Mango Salsa

These tacos have alllll the flavors you could want: sweet mango & lime slaw & fresh & nutty shrimp. This was seriously the best thing I’ve eaten in awhile. I meant for these to be a his/hers taco night but it was too much without prepping the shrimp in advance on a weeknight at dinner time. That weeknight, Mr. J had steak and I ended up sautéing the shrimp in taco seasoning. I whipped these up for a weekend lunch with some leftover slaw and was ohh-so-happy.
The Three Bite Rule - Coconut Shrimp Tacos with Mango Salsa

Make a big batch of the coconut shrimp in advance and freeze and your tacos will thank you later. Reheat in the oven before serving.

Coconut Shrimp with Mango Salsa

Ingredients: (for tacos for 2)

6-8 jumbo shrimp (shells removed and deveined)
2 tablespoons cornstarch
1 egg white, whisked
1/4 cup shredded coconut
2 tablespoons panko
1/2 cup vegetable oil
1 tablespoon mayo
1 tablespoon lime juice
1/2 teaspoon sugar
1 1/2 cup slaw mix or shredded cabbage
1/4 cup salsa
1/4 cup mango (mine was frozen & defrosted)
1/4 cup cucumber, chopped (optional)
1 green onion
4 taco sized flour tortillas

Directions:

Set up the dredging line up of shrimp, cornstarch, egg white, and coconut mixed with panko. Bring oil to medium heat in a small skillet.
Dredge the shrimp into the cornstarch, then egg whites, then coconut mixture. Pan fry for ~3 minutes on each side, then drain onto paper towel.
The Three Bite Rule - Coconut Shrimp Tacos with Mango Salsa
While shrimp is cooking, whisk together the slaw dressing of mayo, lime juice, and sugar. Mix in the slaw.
The Three Bite Rule - Coconut Shrimp Tacos with Mango Salsa
Mix together the salsa, mango, cucumber, and green onion.
The Three Bite Rule - Coconut Shrimp Tacos with Mango Salsa
Assemble the tacos with slaw on the bottom, shrimp, and salsa.
The Three Bite Rule - Coconut Shrimp Tacos with Mango Salsa
Enjoy!

The shrimp was amazing. I really loved the flavor and loved how crispy they were. Now I’m wanting to make a big batch. I fried these since there were only a few.  Usually I stay away from frying things so baking them would be good for a hands-off approach, especially for a big batch.

These could be a fun app in wonton cups with mango salsa on the bottom and the shrimp placed on top.

Peach Raspberry Smoothie

I’m on a serious smoothie kick lately now that it has warmed up a bit. The dead of winter is never when I want to start the day with a frosty smoothie. Know what I mean? I like them to start with greens, but this one was a bit different. I wanted raspberry flavor without the annoying crunch of raspberry seeds. Ugg. They’re the worst. I used some jam and it was perfect! I got a kick of flavor and sweetness without the bulk or texture.
The Three Bite Rule - Peach Raspberry Smoothie

Peach Raspberry Smoothie

Ingredients: for 1-2 servings

1 cup frozen peaches
1 cup yogurt
2 teaspoons raspberry jam
1/2 cup water or juice or milk

Directions:

Add peaches, yogurt, jam, and liquid to a blender.
The Three Bite Rule - Peach Raspberry Smoothie
Blend well and add another splash of liquid if needed.
IMG_7030Enjoy!

I loved this! I used a little V8 Splash in a Berry Blend flavor. The jam definitely sweetened it so water or milk as the liquid would be good for balance. The raspberry flavor was definitely there without that gritty crunch. Yay! Jelly is a fun way to get another flavor & sweetness into a smoothie without the bulk of another ingredient! The possibilities are endless!

Add in some cauliflower, chia or ground flaxseed, or protein powder to up the nutritional content. This smoothie is mild and sweet so it was a nice variation in the rotation for green-based smoothies. Another favorite of mine I haven’t made in awhile is this Peanut Butter, Nutella, and Banana one. They both are very kid friendly will nicely space out green ones or berry flavors if you hit your max on those flavors!
The Three Bite Rule - Peach Raspberry Smoothie
There are more smoothies to come! Stay tuned!

April 2018 Recap

April didn’t quite feel like spring here in New England so I used it as an excuse to get some last of the winter meal repeats in. I didn’t blog quite as much as usual, but maybe this is the new usual. I had a cold that really wiped me out and seemed to last almost 2 weeks. This pregnancy has made me miss nyquil! Tonight Mr. J and I are heading to the event I used to work on and I’m psyched to get to eat the food!

He did all the demo of the basement for that to become play-space/lounge-space/office area/laundry room. We figured I shouldn’t really be around the drywall dust so I was on toddler duty. Mr. J literally tore it down to the studs and carried out 4,440 POUNDS to the dumpster-that’s a weight from the dumpster disposal people! I cannot wait for it to really move along.

These Marsala Mushroom Toasts were probably my fav thing I cooked this month.
The Three Bite Rule - Marsala Mushroom Toasts
A Snickerdoodle Latte at home is so good, and surprisingly easy since I don’t have a fancy milk frother or anything!
The Three Bite Rule - Snickerdoodle Latte

I was pretty psyched to pop these Chicken Parm Turnovers together in advance so when I got home from work they went into the oven to heat/melt the cheese.
Chicken Parmesan Turnover - The Three Bite Rule
I don’t have much planned ahead for May. I plan to relish the spring weather, likely grill more, and envision there are lots of ice cream cones ahead for me! I have a bunch of breakfast ideas so maybe I’ll work on them for May. I thiiiink I have Mr. J’s birthday burger idea for June so that frees up the rest of my burger-topping lists for the rest of the spring/summer!

The Little One:

He’s so fascinated with the basement demo Mr. J did and the “workers” (aka, contractor & plumber) and the dumpster etc. I’m amused how often he’ll tell us he needs to do some work and uses the plumbers first & last name. He likes what he calls “workin’ pants” that have pockets. I say go as long as possible in comfy pants, especially when you nap in them! I’ve really paid attention to his hope that weekend days are “home days”, that he has less desire to leave the house on the weekends than I do, and after a busy day of fun at preschool he relishes solo-play with his stuff when we get home. Food-wise, he continues to eat pretty much everything, sometimes in mass quantities. He loves over-easy eggs and wants to be the one to break the yolk. Avocado, PB&J, feta cheese, rice, bell peppers, and pasta are still favorites. He’s been into salami and eating the yogurt right from the container/cup. Meat is hit or miss. He takes a few bites but usually doesn’t want to have to chew it much.

Bump Update:

I’m into my 6th month, about 26 weeks along. I feel pretty good. While I’m so thankful to be pregnant and feel as though I shouldn’t really complain, I don’t enjoy being pregnant and am counting down to full-term-ness. Sleep is hit or miss. I feel enormous already but am on track according to the midwife. I’ve been hungry a lot of the time but trying really hard not to eat too much. With spring-ish weather I got back into smoothies for breakfast and have made a lot like this PB&J Smoothie but with a green base or green base + random frozen fruit. Getting dressed for work is becoming a struggle. Finding work clothes that aren’t $100 per piece is so hard. Gap & Loft maternity sections seem to think a white knit tee shirt is work-wear.

This Year’s Goals:

Year of the candle: I had saved this gardenia soy candle from my birthday to enjoy in April. It is subtle but nice for spring!   
Cook more appetizers/snacks:
I didn’t really make an app, but think these Marsala Mushroom Toasts would be perfect as tiny crostini and these Chicken Parm Turnovers could easily be miniaturized as an app!  
Taking time to blog thoughtfully:
I’d say I hit my goal on the Marsala Mushroom Toasts. More daylight is so helpful!
Journal the cute moments of my little one: I overheard him tell Daddy from the top of the basement stairs that he was impressed Daddy could run up the stairs without a railing. It was so sweet. 
What I’m reading: 
 at bookclub we read The Handmaid’s Tale. I didn’t love it, and won’t watch the TV series. Maybe I’m guarded reading it while pregnant, or because of the hype, but it wasn’t my fav. 
What I’m watching:
we watched I, Tonya and I loved it. Allison Janney can do no wrong in my book, and I loved how they captured kind of “the other side of the story”. TV hasn’t really have anything making me feel hooked. I rediscovered The Office reruns and absolutely crack up when I need some veg time.

Chicken Parmesan Turnovers

This could also be called, how else to not serve pasta for every meal. I’d be totally ok with nightly pasta but I really truly strive for variation. My little one would gladly eat pasta daily but I love to feel the surprise when it is choice-night/”anything goes” night and I offer 2 choices of easy things (pasta/quesadilla/eggs/etc). If he picks anything besides pasta I’m shocked! I guess I do appreciate being kept on my toes! This was a fun way and super easy way to eat some of the flavors I was thinking about, in another format.
Chicken Parmesan Turnover - The Three Bite Rule

I whipped up these chicken parm turnovers on a weekend in preparation for a mid-week dinner. What’s better than scooting something into the oven on a busy night and just waiting for the oven timer ding? Answer: not much! These are perfect to make ahead of time and par-bake, or make & freeze, or as a use for leftover ricotta or a seemingly small amount of chicken strips/popcorn chicken! I didn’t have a plan for the rest of the block of mozzarella so I shredded it and popped it into the freezer for a future pizza or calzone.

Chicken Parmesan Turnovers

Ingredients: (for 4 servings)

4 crispy chicken strips
1 roll of crescent rolls (mine had 8 crescent triangles)
1/2 cup ricotta (optional)
1/4 cup tomato sauce (of course I used my fav Pastene Kitchen Ready Tomatoes)
1/2 cup mozzarella/parmesan/provalone

Directions:

Preheat the oven and prepare frozen chicken strips according to the package. Mine are fully cooked ones I keep around so I just warmed them through. Then chop into bite-size pieces.
Chicken Parmesan Turnover - The Three Bite Rule
Unroll the crescent rolls into squares, so keep the 2 triangles connected (or make tiny tiny ones using 1 triangle to make as appetizers!). Use a fork to press the seam together and use your hands to flatten the whole square out a little, keeping it even in thickness.
Assemble on one triangle end with a smear of ricotta on the bottom, chicken, a teaspoon of tomato sauce, and a sprinkle of mozzarella or Parmesan.
Chicken Parmesan Turnover - The Three Bite Rule
Gently fold the opposite triangle over the filled side and press to close. A few of mine busted open but I closed the seams as best as possible.
Move to a baking sheet and use the fork to make a few holes in the top of each one.
Bake according to the crescent roll package instructions. (If serving later: My package of crescent rolls had baking instructions of 12-15 minutes so I did about 10 minutes, let them cool, and refrigerated. When serving, I baked for 10 minutes with a sprinkle of shredded cheese & sprinkle of Italian seasoning on top.)
Chicken Parmesan Turnover - The Three Bite RuleEnjoy!

Crescent rolls are cheap, delicious, and easy to work with but puff pastry sheets might be even easier without any seams, or pizza dough would work too. I often have ricotta so that was a no-brainer for me, but skip it if you don’t have a use for the rest.
Chicken Parmesan Turnover - The Three Bite Rule

You could lighten this up using other chicken or breaded eggplant, forming the dough into a muffin tin to only use 1 crescent roll, adding a veggie in there, but I wasn’t making these for health. The crescent rolls have such a great buttery flavor and were a fun change from our norm. I used a pretty small amount of chicken per serving.

Insert soapbox here: Jarred tomato sauce has lots of sugar and salt added. I stand by our fav Pastene Kitchen Ready Tomatoes (#notsponsored). I served some on the side for dipping and my toddler, no lie, spooned it up. The rest of the can of tomatoes went into tomato soup the next night.

These Chicken Parm Pockets may not be healthy, but they are definitely a crowd pleaser, definitely a use for what might not be enough chicken in another setting, and definitely an easy meal to prep in advance. Win, win, win!

Snickerdoodle Latte

Fancy coffees at home without any fancy tools! I found the secret to the perfect snickerdoodle latte! It took a few tries to get the sugary cinnamon flavor, but the trick is: brown sugar simple syrup and some frothy milk!
The Three Bite Rule - Snickerdoodle Latte
Don’t abandon thinking it is too much work. This couldn’t be easier. Simple syrup is sugar and water dissolved. Easy peasy and then pop leftover into the fridge to use the rest of the week. The milk gets warmed and shaken up in a jar for some froth….couldn’t be easier. Trust me, your Friday morning neeeeds this. I used coffee (partially decaf since I’m preggers) but go for espresso if you like!

Snickerdoodle Latte

Ingredients: (for 2)

~1/4 cup brown sugar
1 teaspoons molasses
1/4 teaspoon cinnamon
1/4 cup water
2 cups hot coffee (or 2 espresso shots)
1 cup of milk

Directions:

In a pot, bring brown sugar, molasses, and water to a boil. Stir and remove from the heat.
The Three Bite Rule - Snickerdoodle Latte
Optional: rim mugs with cinnamon sugar
The Three Bite Rule - Snickerdoodle Latte
Brew the coffee (or espresso) and pour into the mugs with a teaspoon of the simple syrup. Stir well.
The Three Bite Rule - Snickerdoodle Latte
Pour the milk into a glass car (without the lid) and microwave for 10 seconds. Stir or swirl it around, and heat again for another 10 seconds. Then cover it and shake vigorously.
The Three Bite Rule - Snickerdoodle Latte
Slowly pour the milk into the mugs keeping the foam in the jar. A spoon helps push it to the side allowing the milk to still flow out.
Spoon the foam onto the top. Sprinkle cinnamon onto the top.
The Three Bite Rule - Snickerdoodle LatteEnjoy!

I tried this first (without the simple syrup) and it just didn’t have enough flavor. It just didn’t read cinnamon & sweet enough. Having the leftover syrup around is perfect to make these again, or even to spoon into my to-go cup for some sweet cinnamon cookie flavor.

Serve these at brunch, as an afternoon treat, or pour into a travel mug to start Friday just a bit sweeter.

Marsala Mushroom Toasts

I’m back! I had a few dishes I wanted to make and blog last week but I didn’t quite get to them. Now they’re all ready so buckle up! Today’s toasts were such a fantastic and balanced lunch and would also be great on little toasts for an appetizer.
The Three Bite Rule - Marsala Mushroom Toasts

Marsala Mushroom Toasts

Ingredients: (for 2)

1 tablespoon butter
1/2 cup baby bella mushrooms, sliced
2 teaspoons marsala wine
1/2 teaspoon worcestershire sauce
2 slices of thickly sliced bread
1 cup greens, chopped (I used a spinach & kale “juicing blend”)
1/2 teaspoon minced garlic
3 teaspoons ricotta (or cream cheese)
salt & pepper

Directions:

Heat a pan to medium heat and melt the butter. Add in the mushrooms and sprinkle on salt and pepper. Stir to caramelize on each side for about 3 minutes. Add in the marsala and worcestershire sauce. Stir until evaporated, about 2 minutes.
The Three Bite Rule - Marsala Mushroom Toasts
Toast the bread, ensuring it gets brown but soft enough to bite through. Bake in the oven if making a whole batch.
While the bread toasts, remove the mushrooms from the pan and use the same one for the greens. Saute the greens in a drizzle of oil for about 2-3 minutes with the garlic and some salt until just wilted then remove from the heat.
Spread the ricotta onto the toast, then add greens, then add mushrooms.
The Three Bite Rule - Marsala Mushroom Toasts
Finish with kosher salt, sea salt, or a drizzle of oil. I had truffle sea salt.
Enjoy!

The marsala flavor here was so great with garlicky greens, and creamy ricotta. I liiiiive for ricotta but if it isn’t your jam, go for cream cheese, or goat cheese, or whatever you like. Any kind of mushrooms would be great here. Marsala could get swapped with cooking sherry or a touch of balsamic vinegar- go for big flavor, the mushrooms will soak it up with the butter. Yum! I had this for lunch but would also go for a little more subtle flavors to be a fun savory breakfast too.

This was a great little lunch using a bunch of ingredients I already had around. The greens are a mix I use for smoothies. Once they’re on the verge of hanging out in the fridge too long I pop them into the freezer. Then I break them off in chunks. I found really awesome rosemary olive oil bread in the discount area so I knew it had to be toasts. Earlier I took the little one to the zoo and had a banana and cheese stick at our zoo picnic so when I got home I was ready for something more.

Breakfast Pizza with Sausage Gravy and Eggs

Breakfast and pizza- the best of both worlds! The sausage gravy serves as the sauce on English muffins and then it gets topped with white cheddar, tomato slices, and scrambled eggs. So good.

The Three Bite Rule - Breakfast Pizza

Breakfast Pizza with Sausage Gravy and Scrambled Eggs (for 2)

Ingredients:

2 breakfast sausage links
1 tablespoon butter
1 tablespoon flour
1/4 cup + 3 tablespoons milk
2 tablespoons brewed coffee
2 English muffins
1/4 cup white cheddar
2 eggs
salt & pepper

Directions:

Remove the sausage from the casing and pan fry the sausage until cooked through, about 5 minutes, breaking the sausage into very small pieces. Remove the sausage and leave the drippings in the pan. Add in the butter to melt over low heat. Sprinkle in the flour and cook for 1-2 minutes. Add in the 1/4 cup milk and coffee. Whisk until smooth. Sprinkle in salt and pepper then return the sausage into the pan.
The Three Bite Rule - Breakfast Pizza
Toast the English muffins and spoon the gravy over the English muffins. Top with cheese and return to the toaster oven or oven to melt the cheese.
The Three Bite Rule - Breakfast Pizza
While the cheese is melting, scramble and cook the eggs just until cooked and remove from the heat. Season with salt & pepper.
Slice the tomato and add on top of the cheese, then spoon the eggs onto the top.
The Three Bite Rule - Breakfast Pizza
Enjoy!

I loved the sausage gravy on these breakfast pizzas. It amps them up big time and takes so little to do so! The bigger chunks of sausage were trickier to layer on but the gravy only uses 2 sausage links, for 2 people! For a vegetarian version, mushroom gravy would be delicious! Use good quality white cheddar here, it is so worth it. I found the tomato freshness and acidity necessary.

In the Oven

There’s a bun in the oven over here! I’m due in early August with a baby girl!
29060747_718258239368_1106922050592730769_o
I’ve been feeling well, just exhausted in the beginning, but better now. I only had a few weird feelings about foods. There was a stretch that raw veggies/salad seemed like a bad idea. I haven’t been able to eat my very favorite pizza for takeout – the Chicken Ranchero, so fingers crossed my taste for that comes back! So far my only cravings have been mozzarella sticks and all the peach yogurt. I was non-stop hungry for awhile and now I’m just my normal amount of often hungry.

I am thankful to be past halfway…countdown’s on!

Uses for all the Hard Boiled Eggs from Easter

If you have a whole bunch of dyed eggs around, here are my fav uses for any hard boiled eggs! I eat them plain as a snack, or egg salad, but that may only take you so far. I’ve actually dyed un-boiled eggs when I wanted to play with the color but not have a dozen hard boiled eggs around. That was without a toddler!

1) Use hard boiled eggs for all the deviled eggs!
They are such a hit at a party…often vegetarian (I made my bacon ones obvious by topping them with bacon so there weren’t surprises), often dairy-free, often gluten free…depending on the variety! They’re a small bite without silverware and don’t require reheating! Make just a few and serve them with dinner or lunch at home. You don’t even have to wait for a party! Are you surprised I have more variation ideas I just haven’t made yet??
Sour Cream & Onion Deviled Eggs
Bacon Ranch Deviled Eggs
Taco Spiced Deviled Eggs
Greek Deviled Eggs
Caesar Deviled Eggs
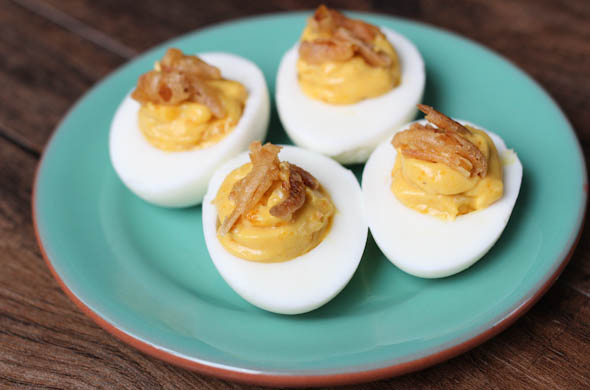
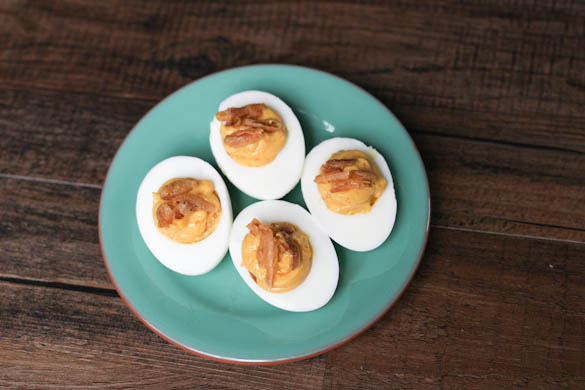
French Onion Deviled Eggs

The Three Bite Rule - Greek Deviled Egg


2) Use hard boiled eggs for the to-go option where you might have another egg!

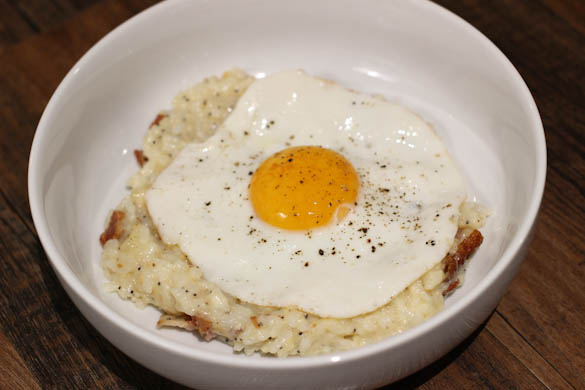
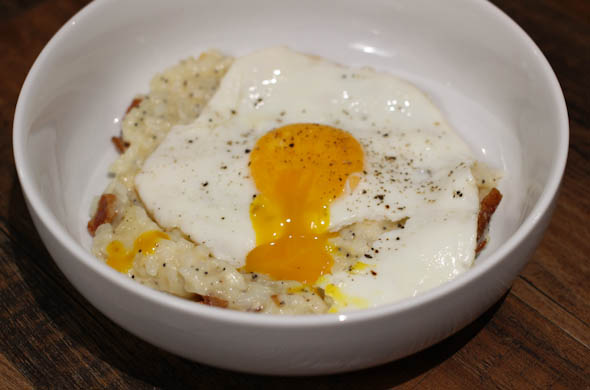
Breakfast Risotto I made had white cheddar, bacon, everything bagel seasoning and was served with an egg for the runny yolk. When I packed leftovers for work, I heated the risotto and chopped a cold hard boiled egg to go on top just before eating (with extra everything bagel seasoning).
The Three Bite Rule - Bfast Risotto
Avo & Egg Toast with Everything Bagel Seasoning would speed up immensely if the egg was a chopped hard boiled one!


3) Use hard boiled eggs to amp up the protein on a veggie side dish!

Caesar Asparagus was a springy feeling side that was just so easy: roasted asparagus, MYO caesar dressing, and top with some hard boiled eggs and plenty of salt & pepper!
The Three Bite Rule - Caesar Asparagus

4) Use hard boiled eggs for Cobb Salad themed anything! 
I made a cobb salad inspired burger. I’ve made a Cobb Salad Dip! Make a cobb salad chicken sandwich! Make it a regular cobb salad! Make it a cobb salad crostini appetizer! Bacon, chicken/turkey, eggs, lettuce/cucumbers/tomato, and blue cheese is always a welcome combo!
The Three Bite Rule - Cobb Salad Burger

5) Use hard boiled eggs for topping on a breakfast pizza!
This breakfast pizza from back in the day had cream cheese with chives spread onto the crust then topped with shredded cheddar, breakfast sausage, hard boiled eggs, and everything bagel seasoning. This is the foolproof way to do eggs on breakfast pizza if you are cooking for a crowd and don’t want to test the baking time needed for an egg cracked onto a pizza!
The Three Bite Rule - Breakfast Flatbread