Creamy Cream-less Tomato Soup

I don’t make soup nearly enough. I was totally enticed when I saw this tomato soup that doesn’t have any cream in it. It’s not that huge of a deal health-wise, but it doesn’t taste the same when it is reheated and it is just one more ingredient needed since we drink light soy milk and that gets wanky in certain recipes. I made it during one of the very brief winter-weather days here in New England.
tomato_soup_bowl_590_390
I loved that the bread made it thick and rich.
tomato_soup_bread_590_390
I grabbed the canned tomatoes and almost choked when I got home. $5 something?!?! WHAT? In retrospect it was totally worth it for good stuff since there aren’t many ingredients annnnd it is the highlight of the soup. Maybe I ate the soup about 6 times so it is not much cost per serving anyway. Ok, I’m over it.

tomato_soup_can_390_590

Ingredients:

3 tbs extra virgin olive oil
1 small onion, chopped
2 medium garlic cloves, chopped
½  tsp red pepper flakes
1 (28-ounce) can whole tomatoes in juice (I used Pastene’s San Marzano Tomatoes with Basil)
1 tablespoon brown sugar
3 large slices good-quality white sandwich bread, torn into 1-inch pieces
2 cups chicken broth
Salt and pepper to taste

Directions:

Over medium high heat, warm olive oil before adding onion, cooking until translucent and starting to caramelize.
tomato_soup_onions_590_390
Stir in tomatoes, sugar, bread, garlic, red pepper flakes.
tomato_soup_soupstarted_590_390
Stir occasionally.
Bring to a boil then reduce heat to medium until bread starts to break down.
tomato_soup_unblended_590_390
Add broth and blend with an immersion blender/blender/potato masher to the consistency of your preference.
tomato_soup_cooked_590_390

I left mine a bit chunky because I like chunks in ice cream, peanut butter, apple sauce, and soup! I made it smooth when I recreated it for some new parents who I thought could use a meal or two.

I served it with grilled cheese (the secret ingredient was pesto) and it was a fantastic wintry meal. Mr. J isn’t into soup so I ate this myself a million times. It is surprisingly filling.
tomato_soup_grilled cheese_590_390
Because I’m feeling especially dorky, I looked up what the nutritional facts are and this is a scant 53 calories per serving! A considerably smaller serving of a condensed tomato soup (who shall remain nameless) is 91 calories (with a lot more sugar, double the sodium, and less iron than mine).

Here’s the cost breakdown because I made such a stink about it:
1 can San Marzano Tomatoes: $4.99
3 slices wheat bread: $0.24
1 small onion: $0.99
2 cups chicken broth: $0.22
total = $6.44 (or $1.07 per serving)

Again, more red food in time for Valentine’s Day!
tomato_soup_bowl_590_390


Tomato and Zucchini for Wow Risotto

Risotto might be one of my favorite comfort foods. I love how creamy it gets and just how much flavor cooks into it. I have a few more in mind but this is an oldy-but-goody. I think I last made it for a girls night dinner circa 2008. This one is red and would be a fun Valentines Day dinner…if you wanted to be thematic.

Risotto really gets a bad rap for being difficult but I don’t agree at all. This one also packs an extra veggie punch with the tomato juice.

Ingredients

1 cup Arborio rice
2 cups tomato juice
1/4 cup water or white wine
1 zucchini
1/4 cup Parmesan cheese

Directions

Toast rice in olive oil for 5 minutes until slightly golden.
Chop zucchini into disks then into quarters.
tomzucc_zucc_590_390
Warm tomato juice and water/wine over low heat.
Add one cup of the hot liquid at a time until absorbed.
tomzucc_pot_590_390
When adding the very last of the liquid, add the zucchini to cook for 5 minutes.
tomzucc_cooked_590_390
Mix in parmesan and serve.
tomzucc_parm_590_390

I sprinkled in some rosemary flor de sal I got in Italy and it was a great use for it. I considered it our starch and our veggie. We had some grilled turkey kilbasa with it too for an easy dinner. The leftovers were good too though they’re a bit more sticky.
tomzucc_sel_590_390
Low sodium tomato juice would work well too if your blood-pressure isn’t ridiculously low like mine. Maybe next time I’ll use my trusty Kitchen Ready tomatoes/sauce since the tomato chunks might be good in there too.
tomzucc_plate_590_390

Gussy Up Glass Plates

When Journey Chic had a call for guest posts I was psyched and had a few projects in mind. For as many serving vessels as I have, I don’t have many dishes that aren’t huge platters. I saw these dressed up plates on Pinterest and thought ‘done’. Check out my guest post (as well as some other rockin’ projects) at Journey Chic.

I’m not quite as crafty as I’d like to be. I had a flopped glass etching project but have since been more realistic with napkin rings and tile coasters. These plates were easy, cute, and totally cheap.
craft_done_590_390

“Ingredients”

Glass plate
1 sheet of scrapbook paper
pencil
mod podge
acrylic sealer
scissors
paint brush (foam or bristled)

Directions

Trace the paper to fit your glass plate.
Cut your traced line leaving ⅛ less on all sides.
My plates were squares so I worried about my ability to stay straight/even so I used scrap booking scissors that look like a jagged cut.
craft_paper_cut_590_390
Snip from the edge towards the center in the four corners (or 4 times for a circle).
Brush the plate evenly with mod podge and stick the paper on (decorative side towards the glue). Prop it up with a jar lid or bottle underneath so you can easily paint with mod podge all the way to the edge.
craft_modge_590_390
Smooth gently from the center towards the edges making sure wrinkles are out and all of the paper is stuck down.
Evenly spread mod podge over the paper allowing to dry between coats (1 or 2 coats).
Once fully dry spray paper side of plates with acrylic sealer in a well ventilated space.
craft_acrylic_590_390
These looked really streaky before they dried but came out really nice in the end. I thought wrapping paper would have been fun to make birthday or holiday plates too. I’d advise against a directional design unless you can be really careful. I had a square plate and striped paper so the lines had to match up perfectly.
craft_drying_590_390
I’m curious about trying it with fabric if it were soaked in mod podge. Hmmm. Maybe that’s a future test.
craft_done_590_390
Note that these can’t be submerged in water, they are more of a cookie plate. To clean, wipe them off and let air dry.

It seems like everywhere has plain glass plates for sale that are pretty cheap. Thrift stores usually have them too. I grabbed mine at Bed Bath & Beyond for only a few bucks per plate. I had the paper, mod podge, and sealer already so this was a very cheap craft. I will definitely keep this in mind next time I need to bring food to somebody then I don’t need the plate back!
craft_plate_590_390

Cost breakdown:

Glass plate: $2.99
Scrapbook paper: $0.28 per page
Mod Podge: $7.00 which will last a lifetime
total: about $4.00

Superbowl BBQ Peanuts

In my moving maddness right before the holidays, I came home to a package and was surprised to find a gift! Mrs. K is totally supportive of The Three Bite Rule and saw the Hunting and Fishing cookbook thinking of my love of cooking and Mr. J’s hunting and fishing trips…not that he’s caught/shot anything for me to cook (just yet).
bbq_peanuts_book_590_390
I thumbed through and was impressed. I thought there were a bunch of fun recipes and the photographs are lovely as well. Most recipes use pretty standard ingredients which is nice. I saw the snack section and picked an easy BBQ peanut recipe to try. The breakfasts look awesome too. Mr. J will have to check out the venison section for the deer meat his brother hunted.
bbq_peanuts_ingred_590_390

Ingredients:

1/3 cup barbecue sauce
2 tbs butter, melted
1 tsp garlic powder
1/2 tsp cayenne pepper
16 oz dry roasted peanuts

Directions:

In a large bowl, combine barbecue sauce, butter, garlic powder, and cayenne.
bbq_peanuts_sauce_590_390
Add peanuts; stir until evenly coated.
bbq_peanuts_mixed_590_390
Transfer to a greased 13-in. x 9-in x 2-in. baking pan.
bbq_peanuts_tray_590_390
Bake, uncovered at 325 degrees for 25-30 minutes, stirring every 10 minutes.
Spread on waxed paper; cool completely. Store in an airtight container.
bbq_peanuts_done_590_390

I thought these were great! They are so easy and will disappear quickly. They’d make a fun superbowl snack or hostess gift. I had cashews and mixed nuts so I decided not to go out and buy peanuts. I used the mixed nuts and they worked just fine.

Thanks Mrs. K! There will be more meals to come from here! Now, if Mr. J would just catch me some salmon!

Three Bean Fiesta

The name ‘Bean Salad’ completely deceiving. My mum gave this recipe to me after raving about it. Then Mr. J was the one raving…he said it was the best side dish ever. This bean salad can be a side or served with tortilla chips as a dip. I got it prepped one morning so it would marinate all day and we had it for dinner.

I got the largest lime I’ve ever seen straight from Florida (thanks Aunt S & Uncle B)! I really wanted to put that to good use so I used it to marinate chicken with honey for a Mexican twist before Mr. J grilled the chicken.
bean_lime_590_390
We are making up for lost time when the grill sat in the garage for 2 years before moving so there’s year-round grilling happening here. Also, my mum made me some taco seasoning for Christmas. I was super excited since I use it all the time and have only ever found it in packets so this jar was a big deal to me.

bean_tacoseasoning_590_390
The taco seasoning when on some brown rice and poof, we had a fiesta (served in fiestaware of course)!
bean_rice_590_390

Ingredients:

½ cup oil
½ cup sugar
½ cup cider vinegar
1 can black beans, rinsed
1 can white beans, rinsed
1 can black eyed peas
1 can Mexican corn
½ cup red onion
1 red or green pepper, chopped

Directions:

Heat oil, vinegar, and sugar until gently boiling.
Pour liquid mix over beans, peas, corn, onion, and peppers.
bean_ingredients
Let stand overnight (or 9 hours while at work).
bean_marinate_590_390
Serve with tortilla chip scoops as a dip or as a side.
bean_ready_590_390

I subsititued white for red onion, since I had it on hand. I didn’t have any peppers so I chopped some tomatoes just before serving. I also didn’t have any black eyed peas so I just went with the other 2 beans. Three cans of beans would be a ton anyway.
bean_plate_590_390
I liked the sweet/tart balance. We ate it a few times but I can see it keeping better if the onion & tomato/pepper was added just before serving.

It was a super easy side and was a pretty healthy one! I’m sure this will have a regular rotation in our house. I’d throw it on salad or tacos or the leftovers drained into soup or chili.  Ohh how fun would a chili bar be at a party?! The wheels are churning here for housewarming parties!
Please Sir, May I have S’more

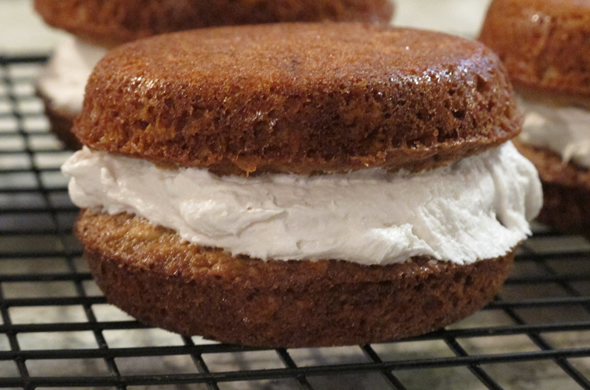
I know, I know, s’mores were so last summer. All summer I just kept thinking I should make one of the many s’mores cookies or s’mores bars out there but I never got to it. This was a good one to flex my baking muscle though! They were a shortbread cookie with a layer of chocolate and a layer of marshmallow. They were topped with a little cookie crumble.
smores_cut_590_390
I made these for my bookclub ladies when I also served them calzones and I knew my colleague Ms. K deserved one after breaking some hearts at work for the youth program.

Ingredients

1/2 cup butter or margarine, softened
3/4 cup sugar
1 egg
1 teaspoon vanilla extract
1-1/3 cups all-purpose flour
3/4 cup graham cracker crumbs
1 teaspoon baking powder
1/4 teaspoon salt
1-1/2  cups chocolate chips
3 cups miniature marshmallows

Directions:

Heat oven to 350 degree F. Spray an 8 inch square baking pan.
Beat butter and sugar until well blended in large bowl. Add egg and vanilla; beat well.
Slowly add flour, graham cracker crumbs, baking powder, and salt, beating until blended.
smores_mix_590_390
Press half of dough in prepared pan. Bake 15 minutes.
smores_baked_590_390Sprinkle chocolate chips over baked layer then sprinkle with marshmallows.
Scatter bits of remaining dough over marshmallows, forming top layer.
Bake 10 to 15 minutes or just until lightly browned. Cool completely in pan on wire rack. Cut into bars. 16 bars.
smores_done_590_390

I liked that these weren’t overly sweet but the gooeyness of the marshmallows made these a fun treat. They’re also a great cookie bar I think everyone would like.

Pumpkin Pasta Perfection

I’ve made this simplified pumpkin pasta a few times since I first saw Rachael Ray make it but I hadn’t made it for real in awhile. This time I used leftovers and it wasn’t quite right. I made it for real just before moving since it only requires a few ingredients and the leftovers are pretty great too.
pump_pasta_bowl_590_39
I like the pumpkin puree since it coats like a sauce on pasta on it’s own and with just a few other ingredients this pumpkin pasta is a winner. It’s a nice pre-fall or mid-winter treat. I carefully avoid the overly pumpkin time in mid-November.

Ingredients

8 oz pumpkin puree (not pumpkin pie filling)
1/2 pound pasta (something short)
2 sweet sausage links
1/2 cup chicken stock (or veggie stock)
4 tbs heavy cream

Directions

Boil water for the pasta.
Remove the sausage from the casing and brown in a skillet.
Mix pumpkin puree and stock over medium-low heat until heated through.
pump_pasta_sauce_590_390
When pasta is almost cooked drain and put it into a flat pan so it is only about one noodle deep
pump_pasta_noodles_590_390
Add in the sauce, sausage and cook over medium-low heat for about 5 minutes until the pasta is cooked al dente.
pump_pasta_mixed590_390
Gently mix in heavy cream just before serving.

I chopped some fresh rosemary over the top too. I thought it was woodsy and I had some on hand. Sage would be good too. I sprinkled a little nutmeg in as well.
pump_pasta_bowl_590_39
I love this dish. It’s rich and flavorful but so simple. I think it’d be a great for guests.

Such a cheap dinner!

Sausage and Pumpkin Pasta

1/2 lb pene pasta: $0.75
1 can pumpkin: $1.79
2 sausage links: $1.42
chicken broth: 4 oz. chicken stock: $0.05 ($2.99 jar/25 cubes=11 cents per cube/cup)
heavy cream: $0.16
total = $4.17 and serves 3-4 ($1.39 per serving)

Grown Up Caramel Corn

A few folks got edible gifts from me this year. Everybody always says they have too much “stuff” so I was hoping they would enjoy a treat that would be gone and they wouldn’t be trying to find a spot for it in their house.

I spotted a caramel corn online and thought it sounded really good and I thought it sounded like a snack with some class. This one featured crazins, orange, and pecans. I improvised a bit. I was impressed with the outcome! I didn’t quite envision the popcorn to come out crunchy without being sticky and soggy but it did!

Cranberry Pecan Caramel Corn (adapted from The Novice Chef)

Ingredients:

2 cups popped popcorn
1/2 cup dried cranberries
1/2 cup chopped pecans
2 tablespoons butter
1/3 cup brown sugar
1/4 cup honey
3 tbs jelly (I used apple)
1 teaspoon vanilla1/4 teaspoon baking soda

Directions

Preheat oven to 275 degrees. Line a baking sheet with a silicone mat.
In a large bowl mix the popped popcorn, cranberries, and pecans.

caramelcorn_funstuff_590_390
Over medium heat stir the butter, brown sugar, and honey until butter melts. Stir in jelly. Bring to boiling over medium heat. Boil at a moderate, steady rate for a couple of minutes. Remove from heat. Stir in vanilla and baking soda (mixture will foam up).
caramelcorn_caramel_590_390
Pour the syrup mixture over the popcorn mixture in bowl; stir to coat well.
caramelcorn_mix_590_390
Transfer to a large baking sheet and bake for 10 minutes, stirring every few minutes.
Remove from the oven and let it cool. If you want clusters leave it; if you want bite sized pieces then spread it out to cool.
caramelcorn_cooling_590_390

Bites This Week

Want a preview of what’s to come on The Three Bite Rule this week?

You can see some high-end caramel corn
caramelcorn_cooling_590_390
you can whip up an unexpected pumpkin dinner
pump_pasta_mixed590_390
and who can forget dessert?
smores_done_590_390
Stay tuned!

Even More Calzones

I hosted bookclub for some super fun ladies and I was racking my brain about what to make. Mr. J and I were on the verge of officially owning the house and I wanted to host despite the boxes all over and Christmas gift wrapping station. There’s a core group each time we get together and a few others come and go so I was looking for a crowd pleaser that would be easy for me to enjoy the crowd while dinner was almost ready. I went to my trusty signature calzones.

I knew I could make these and cook them 75% the night before, which would allow me to visit with them. It also meant most of my cleanup was already done!

I made a broccoli and cheddar one in wheat dough and prosciutto, apple, and brie. I started with carrots and hummus since all other apps were seeming to compete with the calzones and I served some salad and we finished with s’mores bars.
calzone_brie_flap_590_390

Ingredients

1 ball of pizza dough
6 slices of prosciutto
1 granny smith apple
6 oz brie

Directions

Spread room temperature dough out.
Core and chop apple into thin slices.
calzone_brie_apples_590_390
Roll prosciutto into logs and chop chiffonade.
calzone_brie_prosc_590_390
Slice brie.
calzone_brie_sliced_590_390
Layer brie, apple, and proscuitto. Layer and layer until you think there’s too much and keep going.
calzone_brie_insides_590_390
Close the dough around the filling and make a few slices across the top.
Brush with egg wash for a shiny outside.
Bake 375 degrees for 40 minutes on a pizza stone or lined baking sheet.
calzone_brie_stone_590_390
I freeze the brie to make it easier to slice. 15-25 minutes should be enough to cut through. I chiffonade the prosciutto because it can be tough to bite through when the pieces are too big. Let it sit for 5 minutes before slicing so the filling doesn’t ooze out.

Check out just how crazy the filling looked and then when baked it looks like the right amount. That is my prime suggestion for calzones.
calzone_brie_baked_590_390
I usually put sage in, but I forgot it when grocery shopping. I wasn’t sure if it would be everyone’s taste so I thought the broccoli one would be well liked too. Now, How many pennies?

Here’s the costs for the Proscuitto Brie and Apple Calzone:

Pizza dough: $1.50
1 Granny Smith apple: $0.79
1/4 pound Prosciutto: $1.68
6 oz brie: $4.99
total: $8.96 or $2.24 per person for 4 servings