Leftover Rice Recreated into Magic

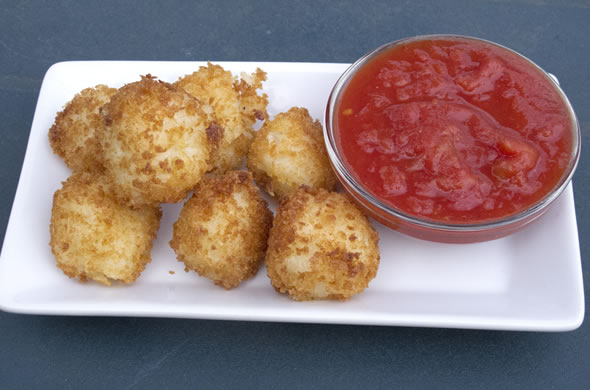
I love leftovers. I love transforming one thing into something totally different annnnnd I love not spending any money to do it. These were a prime example of all these things. I had leftover risotto from the other day. I made more than usual but even with Mr. J and I eating it with dinner one night and leftovers for lunch the next day, there was still a good amount. I decided to make aranchini!
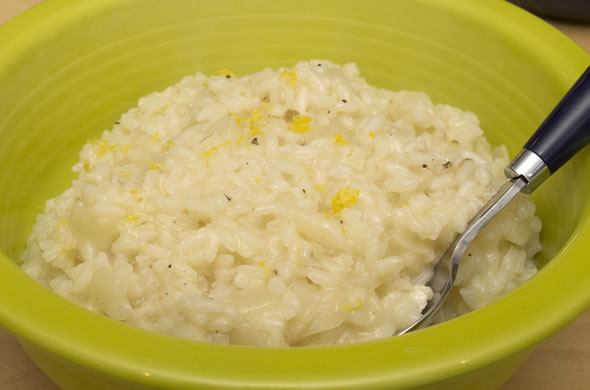
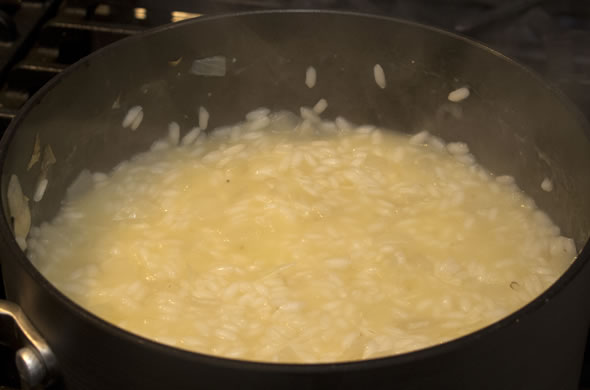
lemon_risotto_bowl_590_390
Aranchini are historically Sicilian but as you can imagine other regions of Italy have similar ones that they’ll tell you are not aranchini. I learned this while dining with the mob. Mine are not authentic since I didn’t have any mozzarella for the middle.
aranchini_plate_590_390
Even without this seemingly key ingredient, these were simply delicious. Maybe because I fried them. I never fry anything so it makes me appreciate it even more. Frying makes me anxious and it’s such a mess.

Ingredients:

1 ½ cups prepared and chilled risotto
2 eggs, whisked with 1 tbs water
1 cup panko
2 tbs grated Parmesan

Directions:

Preheat oil ½ deep in a pan on medium
Scoop refrigerated risotto into 1” balls
Dip each into eggwash then roll in panko until completely covered
Fry in batches turning until golden brown.
Remove and let rest on paper towel.

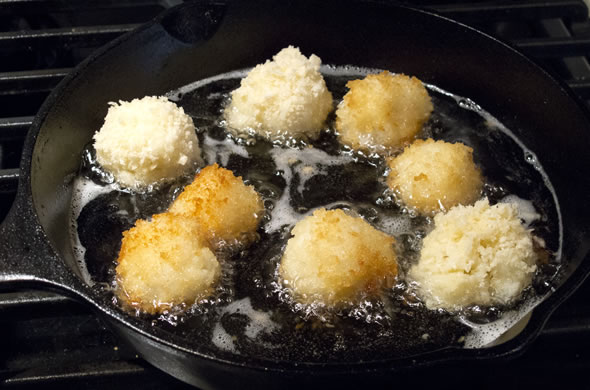
These were so surprisingly good! I let them get pretty fried before turning them the first time. I think that really helped them stay together since they had a solid fried base on the bottom when I scooped with a slotted spoon.
aranchini_fry_590_390
We each ate a few as an app with dinner and I froze the rest. I think they’ll defrost pretty easily in the fridge and bake to reheat. They’ll be awesome when this weekend is over and I can celebrate a successful event (knock on wood!). I work all year for this weekend so wish me luck, dry weather, well behaved vendors, and lots of fundraising $$ coming in!

Bright and Summery Lemon Risotto

I posted some coconut chicken the other day and called that part 1. Today is part 2. The side dish: lemon risotto. Put on your seatbelts because later this week is the leftovers transformed into a real treat. I’m not kidding.
coconut_chicken_plate_590_390
I make risotto quite frequently. Like here. And here. And here. I think of risotto as a wintery comfort food that gets a bad rap for being difficult. I always think that lemon asparagus risotto sounds delicious but I never think of it when spring rolls around. Well here we go! Carpe diem!

I decided on just lemon risotto since I wasn’t feeling having too many parts of the meal all together.

Ingredients:

1 cup Arborio rice
1 cup white wine
1 cup chicken broth (or vegetable broth)
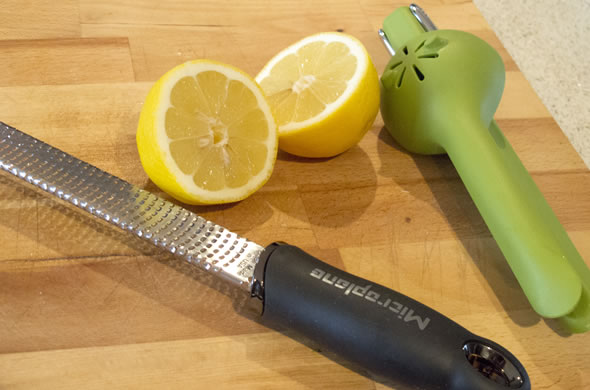
1 lemon (juiced and zested)
1 onion, chopped

Directions:

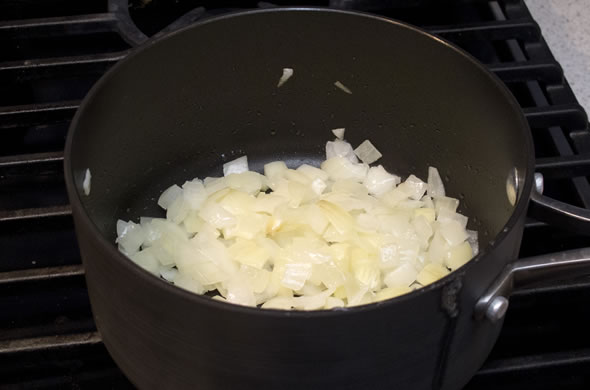
Sautee the onion and a bit of olive oil in a pot.
lemon_risotto_onions_590_390
Start warming the liquids together (stock, wine, lemon juice)
Add the rice into the onions once they’re 75% cooked (translucent but still before they’re totally soft).
Add one cup of liquid into the rice and stir until absorbed before adding the next cup into the rice.
lemon_risotto_cooking_590_390
Repeat until all the liquid is absorbed, little by little. It will take about 30 minutes on medium heat.
Add lemon zest on top once it is totally cooked.
lemon_risotto_lemon_590_390

See? So easy. It takes time and you have to stay nearby, but if you’re putting together other dinner items you’ll have plenty of time. I love risotto and don’t always like regular rice that much. Risotto is creamier, and not as dry.
lemon_risotto_bowl_590_390
Wait till you see what I did with the leftovers!!


Baked Coconut Chicken

Here’s an easy one that will actually be part 1 of 3. I’m crazy right now at work which has spiraled into the rest of my life. I’ve been saying that for awhile but the end is near. Think of all you stress at work, and condense that to 3 months. I’m not at all stressed 9 months of the year, then the insanity ensues. It is worth it…I think.

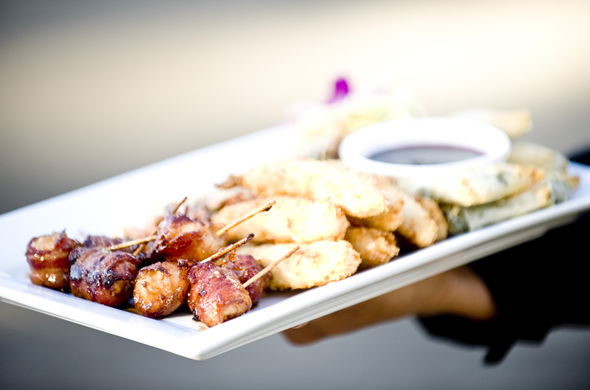
People ask all the time where I get inspiration. Everywhere! This time it was partially from pinterest when I saw some coconut shrimp. I ended up making them around Christmas. The coconut chicken idea was also from the appetizers at my wedding. I wish I had remembered that the coconut chicken at the wedding came with this really silky raspberry dipping sauce. Ohh well, next time!
wedding_ap1_590_390
This was such an easy one to whip up. I had plans for the rest of the chicken but again, like I’m obsessed with, you could make a ton and freeze it. I baked these so they would be healthier and not as messy.

Ingredients:

4 chicken tenders or breasts cut into strips
1 egg + 1 tbs water
1 cup shredded coconut
¾ cup panko breadcrumbs
¼ cup cornstarch

Directions:

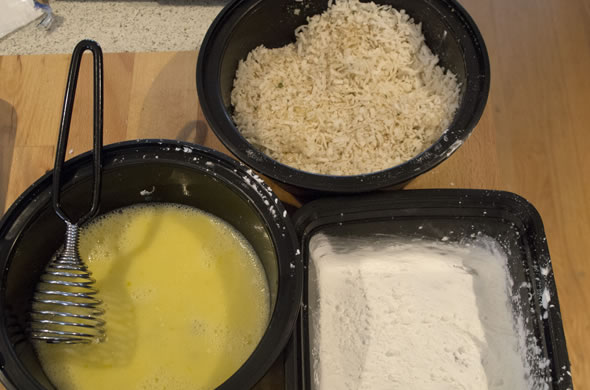
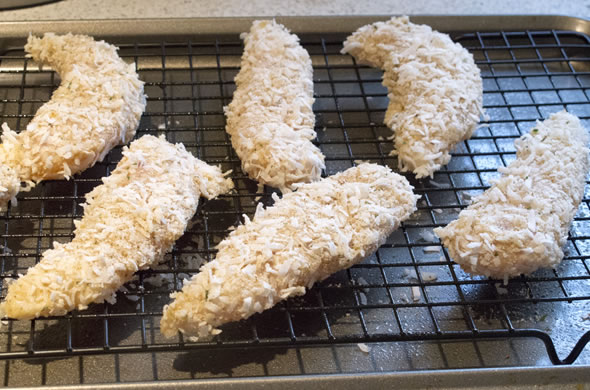
Set up your trio of dredges: 1st cornstarch, 2nd eggwash, 3rd breadcrumbs & coconut mixed.

coconut_chicken_trio_590_390
Dredge each chicken strip and put onto a cookie sheet with a cooling rack on top of it.
coconut_chicken_bredded_590_390
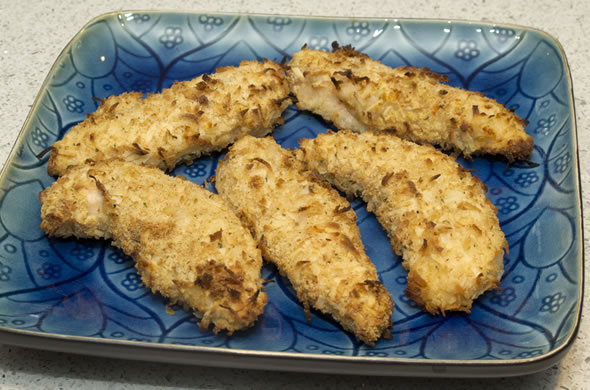
Bake at 375 degrees for 20 minutes, flipping once.
coconut_chicken_done_590_390

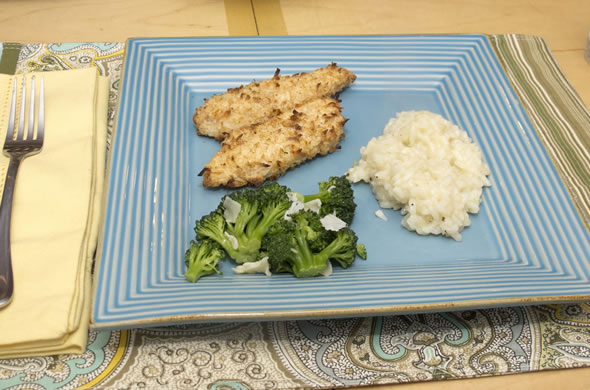
I loved the coconut flavor. It had a great crunch without being greasy. I served these coconut chicken strips with lemon risotto which felt super summery and some steamed broccoli.
coconut_chicken_plate_590_390
Stay tuned for part 2: the risotto and part 3: leftovers turned into a treat!

Cheesy Baked Ziti

My Grandma W wasn’t known for her cooking but I’ve thought of her often lately. She would have loved Mr. J and she would be really proud that we got the house. She was a tough cookie but her grandchildren could do no wrong.
baked_ziti_scoop_590_390
She made fantastic fudge, chex-mix, and baked ziti. Mine didn’t quite rival hers, but it was good. The perfect sauce with lots of cheese was an ideal dinner. I concentrated on making sure there was a ton of cheese and that the noodles were cooked perfectly.

Ingredients:

1 pound ziti, rigatoni, or penne
2 cups tomato sauce
12 oz ricotta
1 cup spinach
12 oz shredded mozzarella

Directions:

Boil pasta until al dente (it will keep cooking when baked)
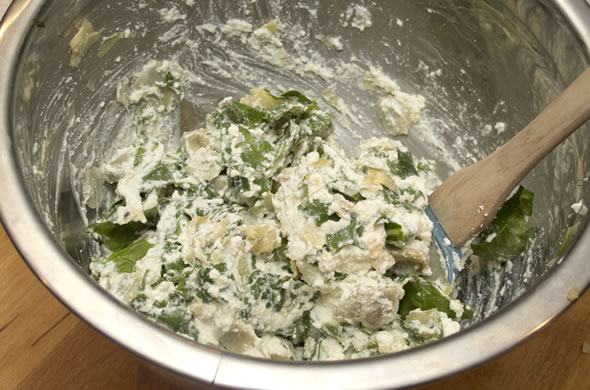
Blend (or chop) spinach into ricotta
Mix ricotta with pasta, half the sauce, and half the mozzarella.
baked_ziti_bowl_590_390
Spread into a greased pan and top with remaining sauce.
baked_ziti_pan_590_390
Bake 30 minutes covered. Then top with remaining cheese and bake until melted.
baked_ziti_baked_590_390
Let sit 5 minutes before serving.

If I were making this Grandma W style, I would have added meatballs, chicken thighs, sausage, pepperoni, peppers, and onions.  Mine was simplier but I liked it a lot. I have a strong love for ricotta.
baked_ziti_scoop_590_390
It reminded me of a baked pasta Ms. L made for me. I liked the crispy ones at the edges. I think this dish is super easy, can be made ahead of time, and is definitely a cheap dinner.

Cost breakdown:
Sauce: $1.67
Pasta: $1.00
Ricotta: $2.69
Spinach: $1.74
Shredded mozzarella: $2.99
Total: $10.09 and serves 6 or just $1.68 per person

Guest Post: Baking Newbie

This is a suuuuuper crazy time of year for me. Think laughing/crying/exhaustion with a never-ending to-do list. I love my job…it just that I have the whole  year’s worth of stress compacted into only a few months. I love that folks wanted to help me with guest posts. Today I have Amy of Wicked Good Travel. You’ve met Amy before, here, and she was here, and I was on her blog here.

Baking and I are not friends. I was always more than happy to reap the benefits of baking that others did, but I wanted no part of hangin’ out with baking on my own. Cooking and I are serious BFFs though. We get along like a house on fire…is that a bad metaphor for cooking? Anyway, whenever baking and I got together it ended in tears, shouting, and hopping up and down in anger. This came along with a huge mess that looked like I’d murdered a platter of cupcakes and then tried to cover up my sins with a bag of flour. Seriously. It never went well.

But lately as I’ve gotten increasingly better and more confident at cooking I felt like I needed a challenge. It started with homemade pasta. The first batch of pasta dough failed miserably, but then I watched a video and tried again and it worked! Then recently I wanted to make biscuits and gravy, but I didn’t have any pre-made biscuits I could pop in the oven, and I thought ‘well, if I’m really a food blogger, then I should be up for the challenge of making stuff from scratch as much as possible.’ So, I decided to try my hand at homemade biscuits. It all was going so well, until I failed to read the ingredients that said “self-rising flour” and used “all-purpose flour” instead, without adding any baking powder or baking soda. You might think at that point I would throw in the towel. But, that simple mistake suddenly flipped the switch in my brain, and seeing what happened to the biscuits minus that ingredient made it easier to understand why I needed to follow baking instructions more carefully.

I know, it all sounds so obvious. And honestly, I did always know why following measurements and not swapping out ingredients on a whim while baking was important. But alas, I’m a creative, passionate type and I didn’t want to deal with that rigidity as I saw it. I wanted to be free to throw this in and add a pinch of that, or totally mix it up or sideways and get downright crazy! Since I couldn’t do that with baking, despite my valiant efforts, I shunned the activity.

Yet, with this recent hiccup regarding the biscuits I found myself getting right back on the horse and the following weekend I made them again. And they came out perfectly. Suddenly, I had found that freedom I always thought was nonexistent with baking. I also found that yes, I could bake. I just had to pay attention as a beginner. Now, I was free to rule the world of baking should I wish! So, with that in mind, I decided to get seriously crazy. I decided… to make scones.

Blackberry Scones

modified from Baking Bites

Ingredients:

2 cups all purpose flour
1/4 cup sugar
2 tsp baking powder
1/4 tsp salt
1/3 cup butter, chilled
3/4 cup milk
1 tsp vanilla extract
1 cup blackberries, fresh or frozen (I used frozen, actually kneads a bit better into the dough)
1 tbsp coarse sugar, for topping (I didn’t have any so I did without)

Directions:

Preheat oven to 400F. Line a baking sheet with parchment paper.
In a large bowl, whisk together flour, sugar, baking powder and salt. Cut butter into 6-8 chunks and add to flour mixture, tossing to coat. Using your fingertips, rub the butter into the flour until mixture is sandy and butter is well distributed, with no pieces larger than a big pea.
guest_scones_flourbutter_590_390
Combine milk and vanilla extract and pout into flour mixture. Stir until dough comes together.
guest_scone_590_390Add blackberries and gently knead into the dough. It is ok if some berries get slightly squished.
guest_scone_berries_590_390 Turn dough out onto a lightly floured surface, and flatten dough into a disc about 3/4-inch thick.
Use a knife to divide disc into six triangles. Place scones on prepared baking sheet.
Sprinkle generously with coarse sugar.
Bake for 20 minutes, until scones are golden brown.
guest_scones_inside_590_390

Again, everything seemed to be going so well, so I snapped photos away ready to blog my triumph. But as the dough came together and I had to roll it out, all seemed lost. It was so sticky and seemed too wet – I couldn’t cut the dough as perfectly as I had expected so I cut rough triangles and gingerly put them on the baking sheet. Hence the lack of photos of the dough. Imagine my surprise when I pulled them out of the oven as the timer bell went off, and cut a piece off with some serious trepidation, and I realized I had made a bonafide scone. They tasted so amazing!! I couldn’t believe it. I’ve already started my next baking venture- I’m going to make oatcakes. The batter is sitting on my kitchen counter as I type, patiently waiting to be rolled out tomorrow, per instructions.

Well, thanks so much to Emily for allowing me a little space on her corner of the Interweb to share my success with you all! I encourage you to give the recipe for Blackberry Scones a go, which can easily become Raspberry Scones, or Blueberry Scones, or Walnut Scones…all I know is we’re gonna be bakin’ away in this house going forward. And I have learned that there’s enough room in my heart and my skills to be BFFs with both cooking and baking.
guest_scones_done_590_390

Cheers!
Amy

Interested in being a guest blogger? Email emily@thethreebiterule.com for more details!

Biscuits and Gravy…it’s not just for Breakfast

Sometimes I’m full of dinner ideas and others I’m racking my brain. I don’t know how I came up with biscuits and gravy but I was feeling especially southern. This is more of a what-I-ate rather than a recipe but I wanted to share my biscuit success!
biscuits_baked_590_390
Some of my thought was I haaaaad to prove it to myself that I could make a biscuit. I tried to make some that looked simple enough for thanksgiving that were a huge flop.

I made simple bisquick biscuits and they came out great! I used a juice glass to cut them. I brushed the tops with butter after cooking for a few minutes. They were light, fluffy, and absorbent.
biscuits_to_bake_590_390
I crumbled 2 sausage links and made a simple creamy gravy. The sausage and gravy topped biscuits.
biscuits_plate_590_390
I felt like we needed something else so I baked apple slices with some brown sugar, maple syrup, and oatmeal.
biscuits_apples_590_390

Broccoli and Cheddar Soup in Breadbowls

I’ve been meal planning lately and it’s working out great. I’ll go into further detail later, but I think it’s helping me a bit more well rounded. Mr. J might have been a little bit nervous when I popped a soup onto the weekly list but we LOVED this.
brocc_cheddar_done_590_390
I wasn’t even going to blog this but just after I got going I figured it was worthy! My roux was perfect. That doesn’t happen all the time. I’ve made a few mac & cheeses that haven’t been ideal because my roux ratios were off. This time it was right on and it made the soup velvety and delicious.

Ingredients:

¼ cup flour
¼ cup butter
1½ cup half and half cream
2 cups chicken stock
2 cups broccoli florets
1 ½ cups shredded cheddar (I used a mix of sharp and American)

Directions:

Melt butter and whisk in flour. Let it cook for about 5 minutes on medium low until golden and sticky.
Add in cream and chicken stock, stirring until well incorporated. Add broccoli and cook covered for 15 minutes.
brocc_cheddar_brocc_590_390
Slowly add cheese and stir until melted.
brocc_cheddar_cheese_590_390
Cook for 15 minutes on low.

I served this soup in bread bowls by just baking lumps of pizza dough and scooping out the middle after the outside was fully cooked. It took about 30 minutes at 375-degrees to cook far enough in. The bread bowls were about baseball size each or a quarter of the dough.
brocc_cheddar_bowl_590_390
It was so thick and could easily be thinned out with more milk, water, or chicken stock. We really liked how creamy it was and the thickness was a good thing to us. I owe all the credit to the roux. I normally don’t measure but the equal parts worked magically.

Look at how interested the pup is. Windsor hangs out by the microwave that is set into the island. He was interested in the chicken stock warming up.
windsor_590_390
This literally could have been fondue it was that thick and melty.  I think it would have liked it as a dip with crusty bread or to fill baked potato skins.

brocc_cheddar_done_590_390

Meatball Subs on Garlic Bread

This doesn’t seem like it really warrants a recipe, but this hit the spot and makes all other meatball subs look sad.The key was the garlic bread. It was a pretty good “water-proofer” to keep the roll from getting too soggy too!
meatball_meatballs_590_390

Ingredients:

2 crusty rolls
7 meatballs
4 slices of provolone cheese
2 cups tomato sauce
3 tbs butter
2 tbs garlic, chopped
2 tbs grated Parmesan cheese

Directions:

Prep the rolls as you would garlic bread (I spread the butter on them, then garlic, truffle oil, Parmesan, kosher salt, and garlic powder)
meatball_roll_590_390
Bake for 5 minutes at 400-degrees.
Cut meatballs into quarter chunks and warm with sauce while bread is toasting.
Remove the rolls and top each one with 1 slice of provolone.
Add sauce, meatball chunks, and more sauce, then top with remaining cheese.
meatball_meltcheese_590_390
Bake 5 minutes at 400-degrees until melted.
meatball_plate_590_390

I loved how garlicky it was and the truffle oil was a great addition. I cut the meatballs to make it more manageable but if they were smaller I might not have.

I think the important thing to remember to keep these as a quick kitchen-to-table dinner is that if everything is warm, they don’t need to cook long. The meatballs and sauce were both warm so all that was happening in the oven was the cheese melting.

Wine Cork Craft

I think I’ve been saving wine corks for what seems like forever. It’s not that I don’t drink enough wine, it is moreso that some of my favorite wines have rubber corks which are good for nothing. I did learn in Sonoma that the fake wanna-be corks, or screwtop bottles don’t indicate the quality of the wine at all.
wine_cork_done_590_390
I started one cork craft but ran out of corks and had to table it until I had some more. For Christmas my brother and sister in law gave me a wine cork tray-kit I’d been eyeing. To top it off, my mother-in-law gave me a BAG of corks. It was perfect I could get right to it!
winecork_bag_590_390
The kit suggested that I map out my pattern before gluing. Good point.
winecork_tray_590_390
I liked this every-other pattern. I had to trim a few but they cut surprisingly easily. I loved that I could get a few of my super special ones into good parts of the pattern. We went to a winey in Spain on the honeymoon so that cork is in there, and my bachelorette party started at a local winery so that cork is there.
wine_cork_closeup_590_390

I’m scooting off to Florida for the weekend just kidding! I’m dropping by for about 18-hours for Ms. M’s wedding and I’ll be remotely drinking to Mrs. A’s birthday! Work is too crazy to be gone but I’m excited for some some celebrating with my hometown ladies! All of that will keep me busy and help to deal with the fact that once again, I cannot attend the Bacon & Beer Festival

Guest Blog Post: Dining in Japan

Miss Liz just got back from Japan and has all sorts of food/meals to share!

I must admit I was nervous about the food in Japan. I went with two friends from work-Bekka and Rachel. I thought there would be sushi everywhere and I’m not a big sushi fan. Turns out, Japan has a wide variety of food and I was pleasantly surprised. Of course, there were lots of food that I was not ever going to try-ie horse meat.

My favorite meal was at a tiny restaurant that only serves dumplings in the Harajuku region of Tokyo. We found the spot courtesy of Lonely Planet.  We ordered some of each type of dumpling-plain and garlic and leek.  They were warm, tender and delicious. I loved the garlic and leek dumplings. Our meal also came with pickled cabbage (which you see every where in Japan) and cucumbers with miso sauce. The miso sauce was the perfect mixture of tangy and spice with the crunchy cucumbers.
japan_dumplings_590_390
We tried soba noodles for dinner one night. They are cold buckwheat noodles. You dip them into soy sauce. Honestly, I wasn’t into it.

Tokyo is famous for its fish market. All the surrounding side streets have tiny stalls selling food. Rachel was adventurous enough to have a huge oyster (again with soy sauce) at 715am.  Some things, none of would try, like the chicken feet.
japan_crabs_590_390
We were always nervous when trying street food. It was never labeled in English and the people selling it rarely spoke English. One day, people were crowded around a stall, we figured it had to be good.  OH MY GOD. This was my favorite food in Japan. Problem is, we still don’t know what we ate. It tastes like fried dough filled with sweetened black beans. Now, that sounds like a silly combo and nothing they would eat in Japan, but it was amazing and the Japanese were lining up for these little snacks.
japan_beanbaby_590_390
It took us a few days to realize, Japan stops serving lunch at 2pm.  Unfortunately, one day, we were really hungry and it was down pouring. We were desperate to find a restaurant that was open and had an English menu.  After 20 minutes of walking around in the rain, we settled on the only open restaurant we could find. They did have a menu with pictures, but no one spoke English. I asked 2 young men in the restaurant what the pictures were and they were able to tell me the following: “Beef, Bird (with a guy moving his arms like the chicken dance) and Shrimp”.  Bekka and I got beef. Rachel decided on “bird” ie chicken fingers.

Before leaving for Japan, I heard about rice balls. I thought I was going to be in heaven. Turns out, its densely packed rice and then fried/grilled and then sits in your stomach like a hockey puck. They sell rice balls, which are not fried but wrapped in nori at convenience stores for quick snacks and breakfast.
japan_riceball_590_390
Rachel did some research in Kyoto in found a really fun local restaurant where we got to sit on tami mats. Kishakura specializes in chicken.  They offered tofu as an appetizer, I passed on it but it looked really pretty.  We share a bottle of local Sake.
japan_nicedinner
One day, we needed to grab a quick meal. So, we had Ramen that we ordered from a vending machine. This is pretty common in Japan for causal restaurants. You order at the vending machine with help of plastic food showing you what your order will look like. The ramen was great. The noodles were thicker than ramen we make a home with boiling water.
japan_ramen_590_390
Finally, sushi! I don’t like sushi, but I tried it in Tokyo at convoyer belt sushi place.  Bekka and Rachel enjoyed it.
japan_belt_390_590
All in all, it was a great vacation and we had some interesting food!

Would you like to be a guest blogger? Email emily@thethreebiterule.com for more details!